What this guide covers
Open Mod Manager (OMM) is an open-source mod manager. This site hosts two HTTP-accessible package trees for Operation Mountain Sentinel: one for Saved Games content (per-user DCS data) and one for Root content (files that belong under the DCS installation). You register each tree in OMM as its own repository so installs and updates stay in the correct place on disk.
Repository endpoints (copy into OMM)
Use these exact HTTPS URLs and display names when adding sources in OMM. Trailing slashes match how the server lists directories.
Saved Games repository
User-level mods, scripts, and configs that live under your Windows Saved Games\DCS (or equivalent) hierarchy.
Display name in OMM:
Root repository
Installation-level packages intended for the DCS program folder (core install path), not under Saved Games.
Display name in OMM:
Before you start
- DCS World installed. You should know whether a squadron package is meant for Saved Games or install root; when in doubt, read the package notes or ask in unit channels.
- Open Mod Manager installed. Download the current release from the OpenModMan releases page and install it using the project’s instructions for your OS.
- Network access to this site. The repository is served over HTTPS. Corporate proxies or strict firewalls must allow
repo.opmtnsen.com. - Clipboard (optional). Copy buttons on this page use the browser clipboard API. If copy fails, select the text in the boxes manually.
Visual walkthrough: Mod Hub, channels, and network repositories
The screenshots below match Open Mod Manager’s typical flow for DCS. Menu labels can vary slightly by version; use this sequence together with the repository URLs above. Click any image to open it full size in a new tab.
-
Download the latest OMM release from GitHub:
-
OMM is a generic mod manager: it can track multiple games. For squadron DCS mods, you will create a Mod Hub dedicated to DCS.
-
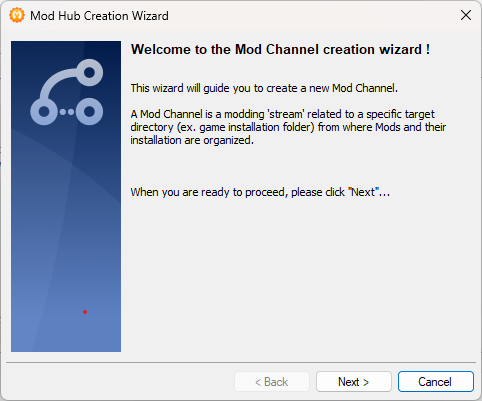
After installing OMM, create a hub for DCS:
- Choose File → New Mod Hub
- Click Next
-
Name the hub DCS and choose where downloaded packages should be stored on disk.
This folder is for downloads, not the live Saved Games or Root install paths. Do not point it at Saved Games or Root here. Using a separate drive is fine if you prefer.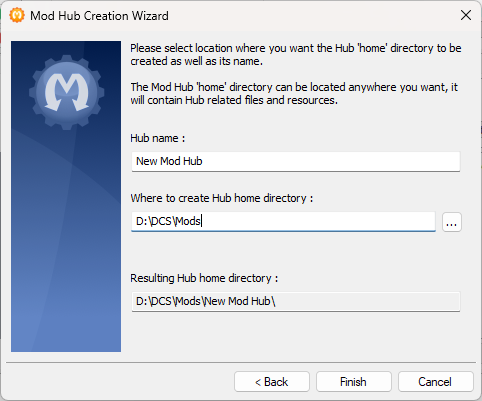
-
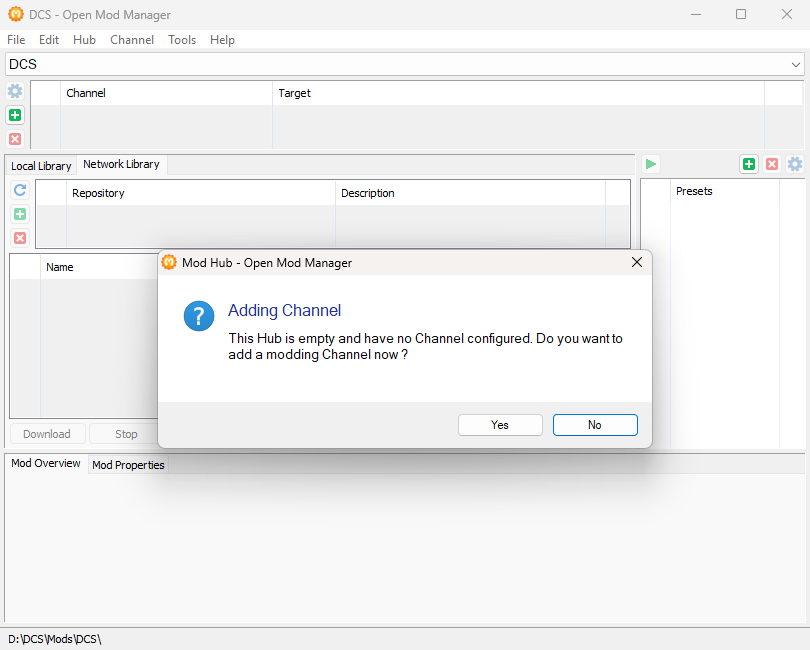
When asked to create a channel immediately, choose No for now (channels are configured in the next steps).
-
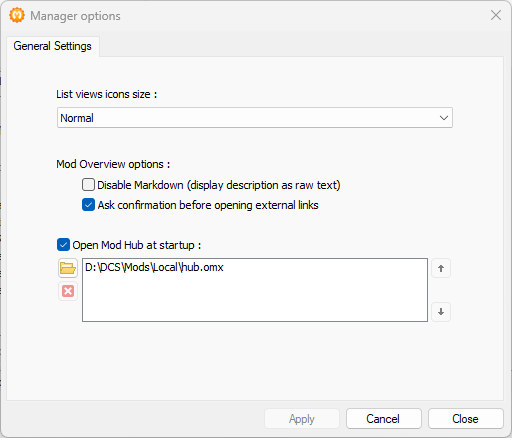
Optionally set OMM to open your new hub on startup:
- Open Settings
- Browse to the hub.omx file in the directory you chose for the hub
-
With that enabled, OMM will load the DCS hub automatically when you start the application.
-
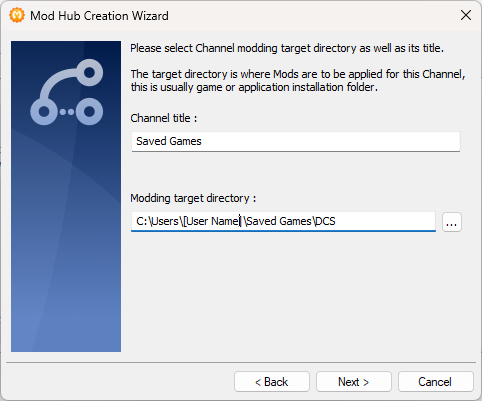
Next, add modding channels for Saved Games and Root (either order is fine; Saved Games first below):
- Use the add-channel control (green plus) in the UI
- Click Next as prompted
-
Name the first channel Saved Games and set its path to your DCS Saved Games folder, for example:
C:\Users\[YourName]\Saved Games\DCSContinue with Next.
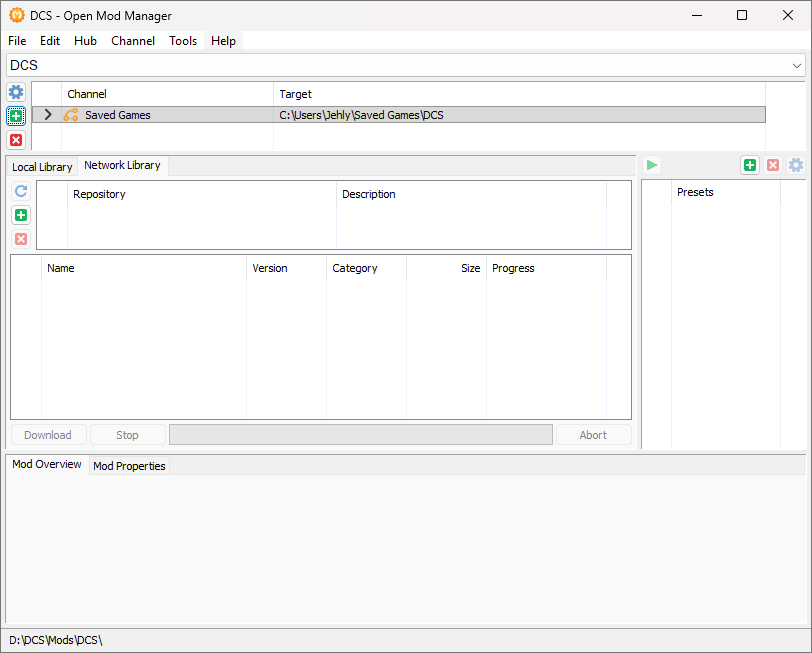
-
Confirm Saved Games appears in the channel list.
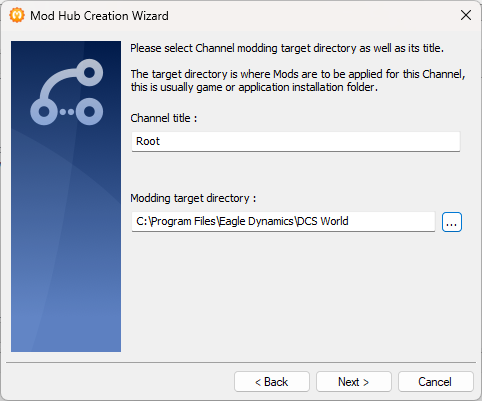
-
Add Root the same way, pointing at your DCS installation folder, for example:
C:\Program Files\Eagle Dynamics\DCS WorldYour install path may differ (Steam, standalone, etc.).
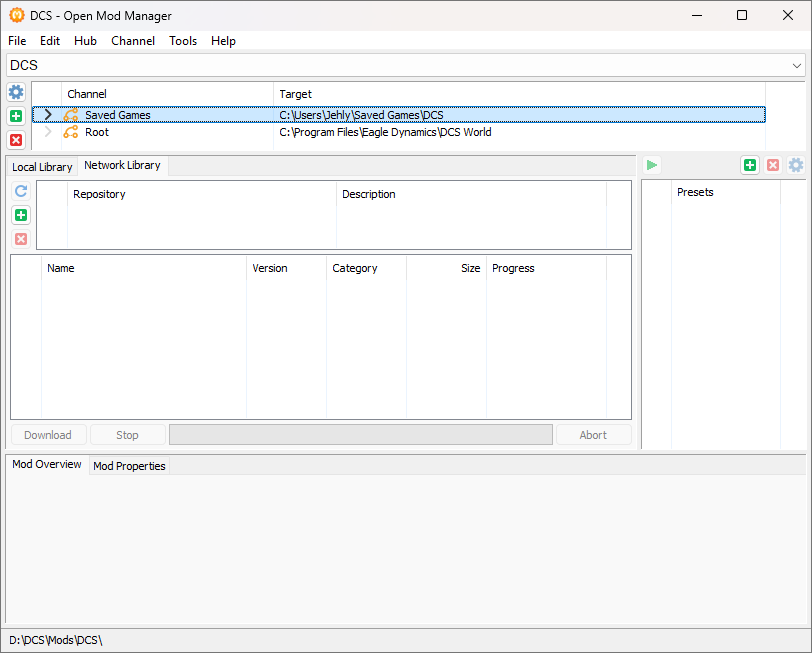
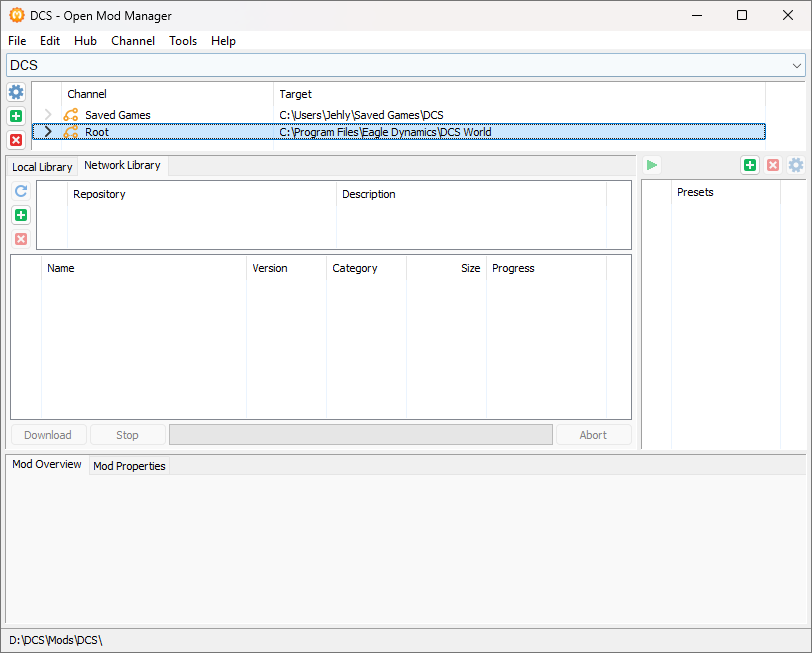
-
When both channels exist, the overview should resemble the following (Saved Games and Root side by side in the workflow).
-
Attach the squadron network repository to the Saved Games channel first:
- Select Saved Games in the channel list
- Open Network Library
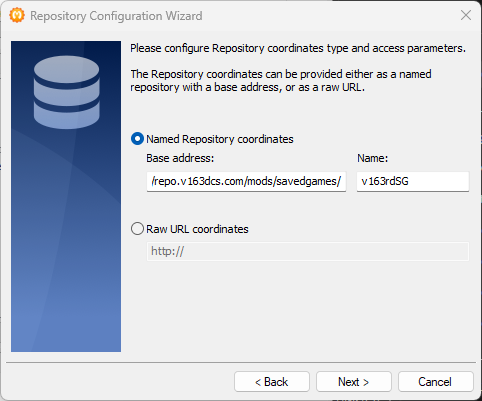
- Add a new network source (green plus)
- Clear Base address and paste the Saved Games repo URL (or use copy below)
https://repo.opmtnsen.com/mods/savedgames/For Name, enter
OMSSG:OMSSG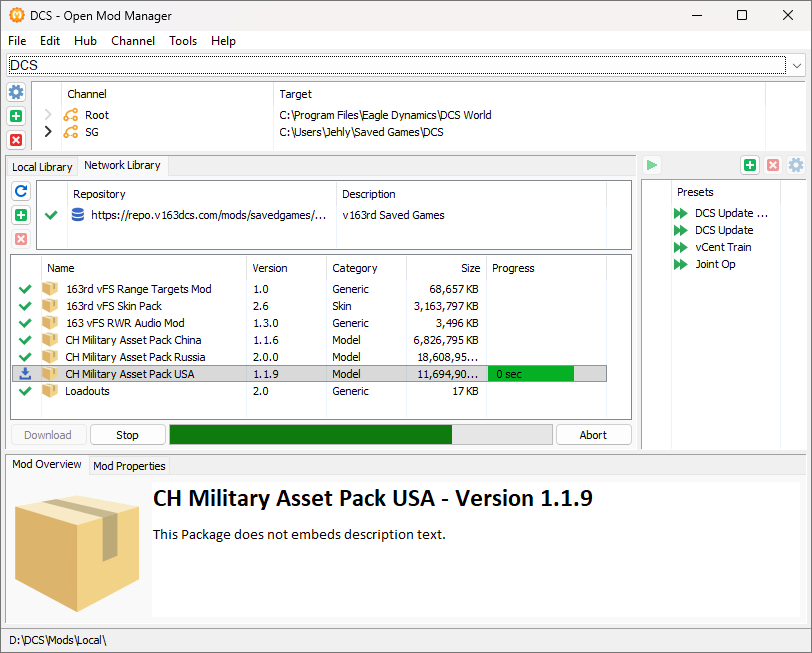
-
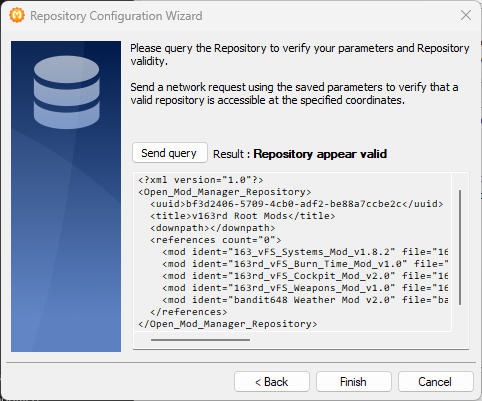
Click Next. OMM should validate the repository and report it as valid. Then click Finish.
-
After the network repo appears in the list, open it (for example by double-clicking) to see available packages. Download what you need; downloading is separate from installing to the channel.
Downloading pulls files into OMM’s storage; you still install/activate from the Local Library when ready.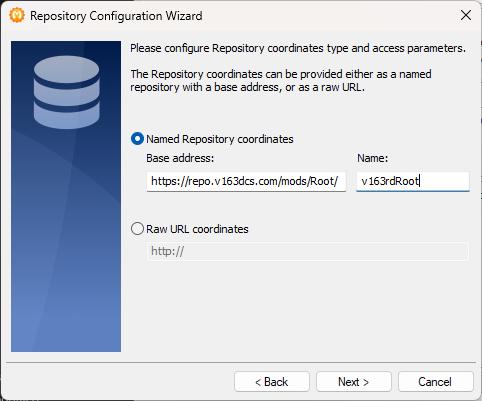
-
Repeat the network setup for Root: select the Root channel, open Network Library, add a source, and use the Root URL and name:
https://repo.opacity.com/mods/root/Name:
OMSRootOMSRootComplete Next / Finish as with Saved Games. The dialogs match the earlier screenshots.
-
Download any required mods from each network library, then switch to Local Library to install. Double-click mods there to activate; a green check indicates they are installed for that channel.
Spot-check the correct on-disk folder (Saved Games vs install root) if you are unsure a package applied to the intended channel.
Saved Games vs Root — why two URLs?
DCS loads content from two major locations: per-user data (missions, some mods, configs) under your profile’s Saved Games\DCS tree, and application files under the DCS install directory. Squadron tooling is split so packages land where the game expects them. Using the wrong repository for a given mod can mean files are ignored at runtime or overwrite the wrong subtree.
Troubleshooting
- Empty list or fetch error. Check HTTPS connectivity, verify the URL includes the trailing slash, and try again after a few minutes in case of maintenance.
- Wrong folder after install. Remove the package from OMM if supported, then reinstall from the correct repository (Saved Games vs Root).
- Copy buttons do nothing. Use manual copy from the URL and name boxes above, or type them carefully into OMM.
- OMM version differences. If a menu name does not match this guide, look for “repository,” “source,” “remote,” or “subscription” in settings or help.